Canon 6D Mark II Back Button Focus Tutorial
In this quick tutorial, you’ll learn how to swiftly enable back button focus on your 6D Mark II camera. This technique works in some form on practically any Canon DSLR, so don’t worry if you have another model.
Grab your camera and follow these easy steps, and you, too, can make use of this handy little Canon 6D Mark II Back Button Focus Tutorial.
BACK BUTTON FOCUS DEMYSTIFIED
We’re trying to achieve controlling the autofocus and shutter release button independently. This can be done by setting up a custom button for the AF function while leaving the shutter release as it is. The button we’re looking to use is ‘AF-ON.’

You’ll find it on the upper right-hand corner of your canon camera’s rear-facing side.
Half of the work is actually done for us by default. That’s because the ‘AF-ON’ button is, out of the box, already set up to activate the autofocus system.
The only thing we need to change is to de-link the AF function from the shutter release.
As you probably already know, your camera usually autofocuses when you gently half-press the shutter button. This is the feature we’re going to unmap.
Instead, we’ll reprogram it to the ‘AF on’ button on the back. Hence, back-button autofocus.
SETTING UP BACK-BUTTON FOCUS
Now for the fun part. This is where we finally set up our Canon 6d Mark II back button focus.

STEP ONE
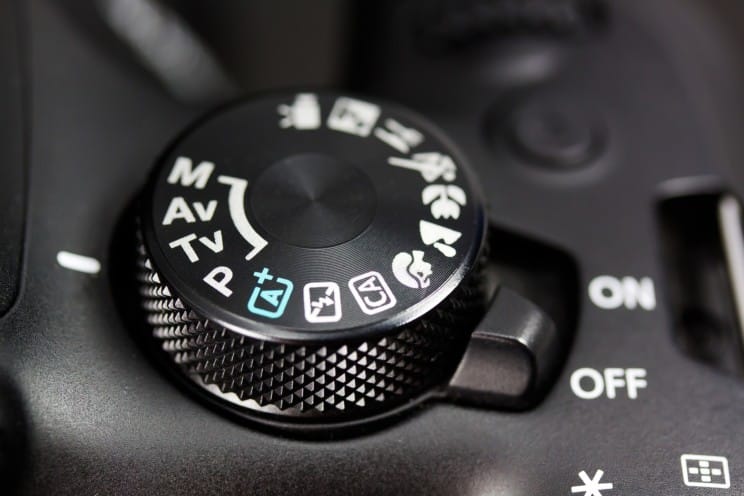
First thing’s first. We need access to the custom settings menu. However, it’s not available in Full Auto (A+). Nor is it possible to access it in the Creative and Scene modes (CA and SCN) on a Canon EOS 6D Mark II.
This means we need to rotate our mode dial to either C1, C2, M, Av, Tv, or any other mode except for SCN, CA, or A+. This part is dead simple – just rotate and check whether the custom settings menu is available when pressing the Quick Menu button (Q).
MTV or MAV are both easy-to-remember abbreviations, if in doubt.
On the right-hand side of your camera screen, you’ll find the camera icon named ‘Custom Controls.’ This is the one we’re after.
Once entered the custom controls menu, we can choose to customize no less than nine different buttons on our 6D Mark II. However, we only need one for this tutorial.
STEP TWO
While the first (upper left) button is selected, the title and description should read ‘Shutter butt. Half-press’. Per default, the chosen option should be Metering and AF Start’.
Once we select the icon and enter the next submenu, we’re presented with three choices:
- Metering and AF Start
- Metering Start
- AE Lock
STEP THREE
For back button AF, we need to change the selection from the first to the second by choosing ‘Metering Start.’ This unlinks the ‘AF Start’ function from the shutter button.
All done. Once you’ve selected the middle option named ‘Metering Start,’ exit. Lightly tap the shutter button to instantly jump out of the menu.
What now? Apart from testing out the new setup, you could, of course, go full OCD and explore the rest of the menu. For example, it’s possible to change how you lock exposure with the ae lock button. But let’s save that for another time!
ULTRA-FAST RECAP OF THE ENTIRE BACK BUTTON AF SETUP PROCESS:
- Set the Mode dial to M, Av, or Tv.
- Q-button – Custom Controls
- Upper left ‘Shutter’ – Then, the middle option
Here’s Canon’s Video Guide on Mastering Back-Button Focus:
Final Thoughts
That’s it. You’ve now learned how to set up your Canon 6D Mark II back button focusing and change it back if need be.
This power tip will undoubtedly improve your accuracy and efficiency as a photographer and increase the number of keepers.
It works on any Canon DSLR including 5D Mark IV.
Although the art of back button focus might eventually become less relevant with the advent of newer technologies such as AI servo, those of us with older cameras can still benefit hugely from it.