How To Connect an External Microphone to an iPhone
If you’re using your iPhone to record video, the video quality will be excellent.
However, if you’re relying on the iPhone alone for audio, you’ll be disappointed with the audio quality.
To achieve more professional quality audio results, many vloggers, professionals, and hobbyists connect an external microphone to their iPhone.
This article covers the recommended kit and a number of how-to sections.
Let’s dive in.
What Is the Best External Microphone for Your iPhone
Here are some of the best external microphone options for your iPhone that are available in the market today:

- IOS Lightning Connector
- Pocket friendly
- Fully adjustable
- No wind noise
- Lightning connector
- Designed for IOS
- Good quality audio
- Lightning connector
- Clear Sound
- Lightweight & Clip on Mic
- Battery-Free & Plug and Play
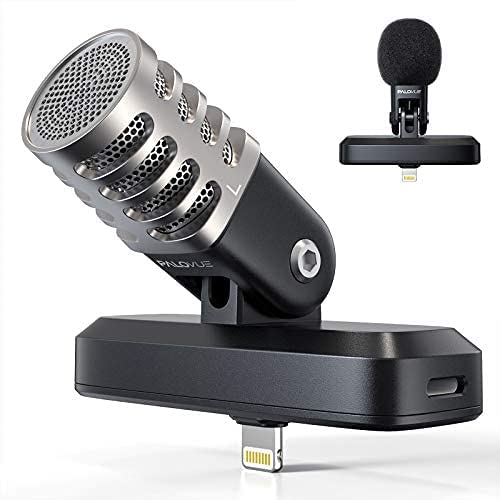
1. Shure MV88 iOS Digital Stereo Condenser Microphone
This is an incredible Lightning port microphone that plugs straight into your iPhone.
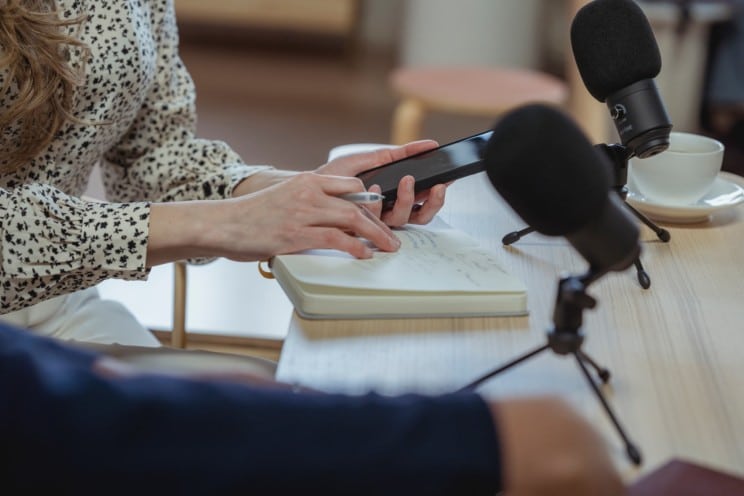
Because it goes straight at the bottom of your phone, you can use the entire setup as a traditional mic, which is ideal for interviews and recording podcasts.
It offers flexibility with its setup and allows you to use it in different directions.
You can shoot in front of your iPhone or switch it around and use the back camera to film portrait or landscape orientation.
The MV88 provides clear sound quality even when you’re 20 inches away, which is ideal for live streaming or filming YouTube videos.
It also produces a crisp sound and more focused audio, eliminating background noise like the echo in a large room.
This makes the MV88 a great mic to use for musical instruments, whether it’s a piano or acoustic guitar recording.
Shure also comes with an audio recording app called Motiv that customizes your files into higher resolution.
The MV88 also comes with an LED light that lets you know whether it’s turned on or off.
2. Rode VideoMic Me-L Directional Microphone for iOS Devices
This microphone goes straight into your lightning port.
An update of the Rode VideoMic Me that comes with a TRRS headphone plug-in, the Rode VideoMic Me-L (with the letter “L”) is considered a better version, especially for later iPhone devices that no longer have the standard audio jack.
The previous version (without the L) requires a dongle.
When you connect the mic to the dongle, it just hangs off the phone, which can be a problem if you need to mount the phone on a rig.
Unlike the MV88, the Rode VideoMic Me-L always points to the subject, limiting the direction or options for the camera’s set up and orientation of the camera vis-à-vis the speaker.
It is ideally used as a shotgun microphone and filming the speaker in front of the iPhone camera.
When it comes to audio quality, the microphone captures the sound coming from the subject right in front of the camera, even one foot away.
It eliminates unnecessary noise, like a windy background, pointing towards the subject and capturing the primary audio in a directional pattern.
The Rode VideoMic Me-L shines through in noisy environments when there’s a need to pick up the subject’s audio and cut out other nearby sounds.
Like the MV88, this Rode microphone is ideal for live streaming and recording YouTube videos, even presenting during a webinar or Zoom meetings.
It comes with a “dead cat,” best used for windy settings and vlogging outdoors. It also comes with a headphone jack at the back, which is excellent for monitoring audio in real-time.
Rode has an audio recording app called Reporter, which allows you to do uncompressed audio recording, edit and adjust your audio files, control the directional pattern of what audio to capture, fine-tune the file, and many more.
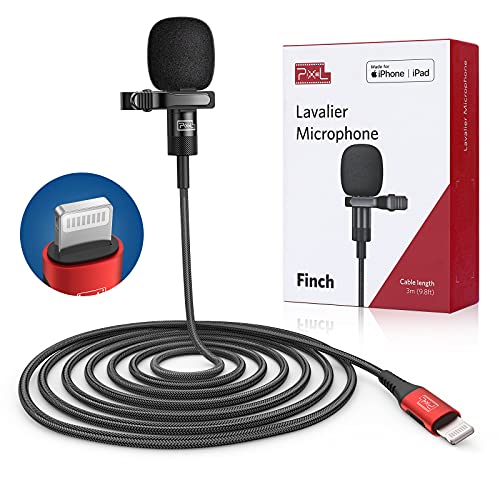
3. Rode smartLav+ Lavalier Microphone for iPhone and Smartphones
The smartLav+ is a lavalier microphone that can be clipped to your clothes. It requires a dongle to connect to an iPhone.
As the case with clip-on microphones, the smartLav+ can only capture the audio from one person. It is ideal for live streaming, recording YouTube videos, or reporting on the field.
The cable can be pretty short because the mic is connected through a dongle and clipped on the shirt. The subject, then, has to sit closer to the camera, which can be limiting in terms of the video setup and orientation.
Rode has an extender cable available in the market, but if you’re on a tight budget, using the smartLav+ can get pricey quick.
It has excellent audio quality and is even better than the built-in microphone. However, it is not as crisp and focused as the other two options.
4. Shure MVL Omnidirectional Condenser Lavalier Microphone
The MVL mic is a lavalier alternative to Rode’s smartLav+. It is two inches longer in cable length and has relatively the same audio quality as Rode’s lavalier microphone.
How To Connect an External Microphone to an iPhone: The Accessories You Need
There are many external microphones in the market today. While you can pair them with an iPhone, some – if at all – are specially designed to work with an Apple product.
It is then essential to know the accessories that need to go with external microphones.
The accessories you need to connect an external microphone to your iPhone include a Lightning adapter, TRS to TRRS adapters, and XLR to TRRS adapters.
Picking which adapter to use depends on the iPhone model you have. If your iPhone has a 3.5mm audio jack, you can use headphones and Lightning sockets.
If your iPhone doesn’t have a headphone jack and only a Lightning one, you need to use TRRS adapters.
Things get a little tricky when the external mic has a TRS connector, as the iPhone won’t detect it and will still use the built-in one.
These mics won’t work because TRS has a stereo sound, the electrical connections don’t match, and the audio-only travels one way.
Luckily, most external microphones with a 3.5mm connector have TRRS and iPhone compatible.
What You Need To Know About iPhone’s Built-In Microphone
Before we dive deep into a how-to, it is essential to know why you need an external microphone on certain occasions.
An iPhone’s built-in mic does the job of recording personal or non-professional audio and video outputs.
It is an excellent tool for recording multiple audio bites and editing them on the fly.
However, if your audio needs go beyond modest, an iPhone’s integrated microphone may not give you the professional quality you require.
An iPhone’s built-in microphone is considered omnidirectional. It picks up all nearby noises from all directions, which is excellent if you need to record multiple people at once.
However, if you need to record your voice in an outdoor or noisy indoor setting (like a café), you will need an external microphone to filter out unwanted room and background noise.
Likewise, if you are recording a video and you need to stand a little further away from your iPhone, the built-in mic may not pick up everything that you say or have your desired volume for the video.
You will then need to connect an external microphone to your iPhone.
How To Connect an External Microphone to Your iPhone Using a TRS to TRRS Connector
If you have an iPhone with a 3.5mm jack and want to use the external microphone with a TRS connector, plug the mic into your TRS-TRS adapter and connect the other end to your iPhone.
If you have one of the recent models of iPhone that does not come with the usual audio jack, you have to plug the external microphone into the TRS-TRRS adapter.
Get your Lightning adapter and plug the TRS-TRRS connector into the 3.5mm audio jack. Connect the other side of the adapter to your iPhone Lightning jack.
If you have an external mic with a TRRS connector, things become more straightforward as you can plug it straight into the iPhone without using the TRS to TRRS adapter.
How To Connect a Lavalier Microphone to Your iPhone
What Is a Lavalier Microphone?
A lavalier microphone, also known as a lav mic, is a small, external microphone typically clipped to the front of a person’s clothing.
Lavalier microphones are often used in television and film production and live performances because they provide precise sound without the need for bulky equipment or intrusive placement.
Lavalier microphones come in various shapes and sizes, but all share one common feature: they are designed to be discreet and easy to use.
Many lavalier mics include a clip or mount that allows you to easily attach it to your clothing or other surfaces.
Some lavaliers also come with a built-in battery pack, which provides power to the microphone and eliminates the need for an external power source.
If you’re a travel vlogger who’s on the go or about to film an interview, then a lavalier microphone is for you.
Connecting a Lavalier Microphone to Your iPhone
To connect a lavalier mic to an iPhone, plug it into the 3.5mm audio jack of your iPhone.
If yours is an iPhone 7 and up without the traditional audio jack, you’ll need to pick up a Lightning adapter to use the lav into it.
You can make things easier by getting a wireless lav too!
They can connect to any iPhone through Bluetooth, allowing you to be far away from your phone from 5 to 50 feet (or 152.4 to 1524 cm).
Depending on the lav mic’s brand, type, and features, you will need accessories that may include adapters such as a Lightning headphone connector and XLR to TRRS and a wireless receiver with XLR output.
How To Connect a Condenser Microphone to Your iPhone
What Is a Condenser Microphone?
While lavalier microphones are easy to use and discreet, they do not give the highest-quality audio possible from your iPhone.
If you’re looking for an external microphone that produces professional, best-quality audio outputs for your videos and podcast, then you need to have a condenser microphone.
A condenser microphone is an external microphone that uses a capacitor to convert sound into an electrical signal.
They are often used in recording studios and other professional settings to capture a broader range of frequencies than traditional microphones.
Condenser microphones tend to be more sensitive, making them better suited for capturing softer sounds.
Thanks to their wide range of applications, condenser microphones are an excellent choice for anyone looking for an external mic that can handle a variety of settings.
While these mics can be a little more expensive than other types, the results are often worth the investment.
Connecting a Condenser Microphone to Your iPhone
If you want to make your videos look professional, then an XLR condenser mic is the way to go.
You can set up this mic with your iPhone through a soundboard. A dedicated audio mixer would also be great.
This setup is perfect for stationary setups like a studio but less than ideal when filming or vlogging outdoors.
It also requires meticulous arrangements because the audio may pick up unnecessary noises if not set up correctly.
A soundboard or an audio mixer allows flexibility as it lets you adjust various settings, change the microphone’s volume and audio level, fine-tune frequency levels, and many more.
It also provides a phantom power of 48v required to make a condenser microphone work.
Tools You Need To Connect a Condenser Microphone to an iPhone
While the arrangements for a condenser microphone with a soundboard or audio mixer may sound complex (it is), using this external microphone produces excellent results when set up correctly.
The tools you need to create a proper setup include the following:
- Lightning headphone adapter
- XLR-XLR mic cable
- RCA (phono connector) to 3.5mm TRS adapter
- TRS-TRRS adapter
- A dedicated audio mixer or soundboard
Make sure that all components are correctly connected to maintain the integrity of your audio. Remember these three key things when you set up and control audio levels:
- iPhone recording level
- Audio mixer master audio output
- Audio mixer microphone input
While a setup comprised of a condenser microphone, a dedicated audio board, and an iPhone is not for noobs, it is the closest you can get to studio-grade recording quality.